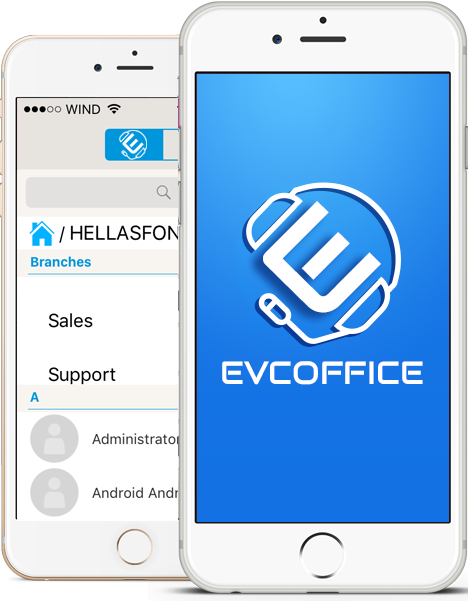
It is a mobile app for both android and IOS, that you can use it as an office extension tool .
You can make and receive calls, share files and more, as if you were behind your desk .
- The first step is to sing up and create a Demo account. Sign up is free and it only takes a couple minutes.
- Log into your EVCOFFICE newly created account.
- Proceed to Settings and MY ACCOUNT
- Change your plan from TRIAL to any one of the available Plans for your area.
- Select the number of users, add bundles, select a Phone number for your PBX, and add additional funds for out of plan calls.
Congratulations and Welcome to the CLOUD!
For out of plan calls you simply need to have credit in your account.
From the MY ACCOUNT settings in your portal, you can add credit to your account for all your out of plan calls. The credit never expires and is shared amongst all users.
Example: Customer in the USA.
The customer has sufficient bundles and airtime in his account for calling across the USA, but he now needs to call the UK, and his current bundle for the USA does not cover calling the UK.
In this situation, the customer can add credit to his account for out of plan calls. This amount will be used only when calling destinations that are not covered in the customers monthly plans and bundles.
The credit is passed from one month to the next and never expires.

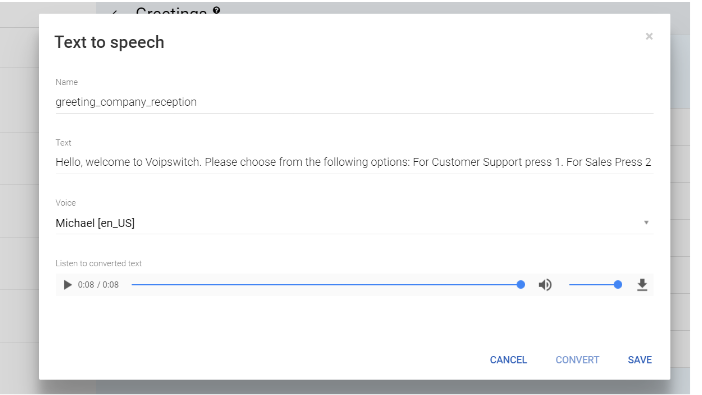
Create profesional greetings with our Text to Speach.
Simply type the message and select the voice you like best. Save the greeting you like best.
We offer male and female voice conversions, and support English, French, Italian, Spanish, German, Brazilian and Japanese voice translations.
ANYONE and EVERYONE can call you and reach you on your EVCOFFICE PBX, by simply dialing your company's phone number. Our DID's are configured to work with all providers wold wide.
You can receive / make calls, text, chat, video and exchange files and location with all your company colleagues and EVCOFFICE users for Free from your online portal and our EVCOFFICE mobile apps
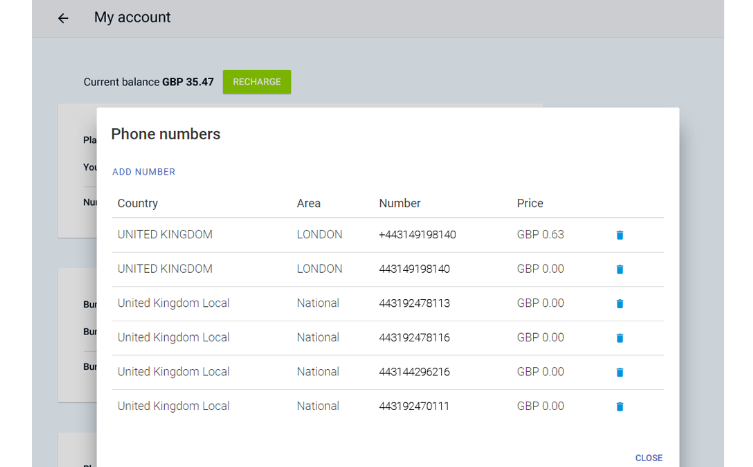
Purchase Local numbers directly from your EVCOFFICE portal. For advanced management of your Local Numbers, you need to log in to myaccount.
In your customer portal you can record greetings for voicemail , and take advantage of all the free calling features.
From the Greetings menu you can manage all the greetings used in various features such as auto attendant or voicemail.
Every user has access to his own Greetings menu, and can :
- record greeting , using microphone from pc and app.
- upload greeting
- Text to speach, Type out your greeting and let our AI convert it to AUDIO. Select gender and language for the voice you want to hear on your greeting.
The greetings for the PBX auto attendant and other general IVR's can be recorded directly from the Admin login portal.
Every company user can log in to his portal and record or upload his Voicemail or other IVRs for his personal use from the My Profile menu in his account.
Caller ID is the number shown to the called parties when calling offnet numbers .
A user can choose one of the phone numbers assigned to the company i.e. the default company phone number or personal DID, as his caller id.
Only the admin user can purchase and assign phone numbers to users.
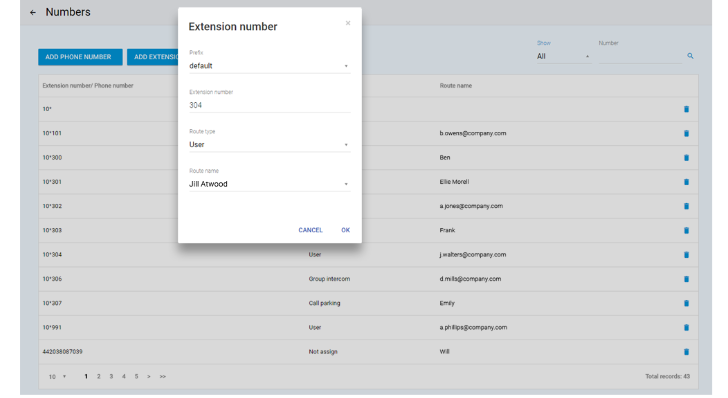 Extensions are short 3 to 4 digit numbers that are assigned to users by the Administrator. They are used to direcly dial and call the users withih the Company PBX network.
- Users (it makes easier to dial manually from a device)
-
Call park – extension is needed for direct pick up .
-
Call group .
-
Group intercom .
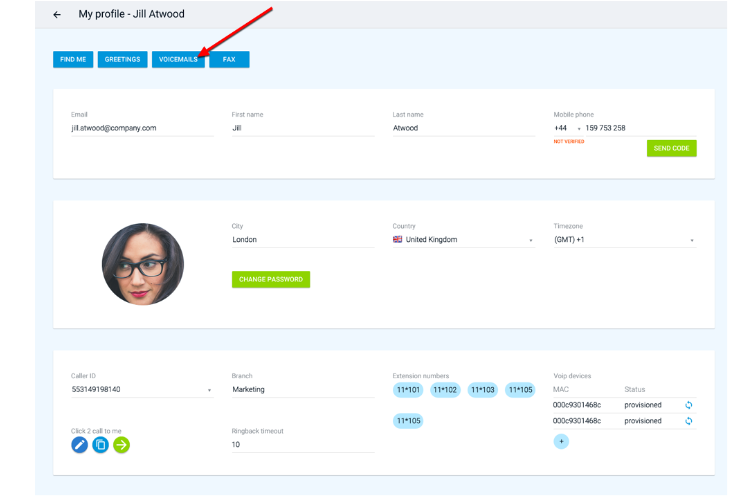

The portal includes the following set of communication tools:
• call records of all your calls
• send sms
• Record Greetings for voicemail customization
• Register phone numbers for pin less dialing. Add your home number or your number at work, and use the service with pin less dialing by calling our access numbers.
• free calls to other EVCOFFICE users
• free chat to other EVCOFFICE users
• free video with other EVCOFFICE users
• free conference calls and chats with other EVCOFFICE users
• DO NOT DISTURB - block any unwanted numbers from ever calling you again with one click. Its never been easier.
• user profile
• address book
• call forwarding management
• personal voicemail
• failed calls lists
• Send : Image ,Video ,Audio ,File ,GEO-Location ,Share contact
• Speed Dialling
• missed calls history

You can choose plans and check your payments from the account menu .
This is available only to admin users and is in the Company settings menu .
When you sign up to the EVCOFFICEPBX ,you choose the service plan.
The offered plans differ in price per user and the number of included minutes.
You can see what is your current plan and you can choose another plan by clicking on the
Change button and selecting another plan from the list. If you have atrial plan you can upgrade to a paid one .
The payments for the plan’s subscriptions are made automatically through Paypal .
The payments menu contains:
- Payments history
- Recurring payments
- Invoices
Invoices are generated monthly at the first day of each month. They include all the paid items.
The Recurring payments menu shows the subscription historical payments and the payments due in next payment cycle .
 The Channels are collaboration tools. The group/people that work together on a given project–channel members .
You can call from the PBX portal to a user who has installed on the mobile the EVCOFFICE app .
User to user calls are referred to as free, both in the portal and mobile apps .
From EVCOFFICE PBX you can also call as well phone numbers from other networks (mobile or landline).
Video icon is available only for the onnet calls .
User to user audio calling uses HD voice codec which is also dynamically adjusting to different network conditions.
To do that you need to provitioning your VoIP Device .
The platform supports VoIP desktop phones (VoIP devices).
The recommended brand is Yealink and GrandStream but on request other devices can be added .
Each user can have multiple devices assigned to his account .
They all will register to the service using the same account .
Devices can be added:
-by admin user through the Users menu; Admin can manage devices of other users
- by a user through the My Profile menu
To add a device, you need to click on the plus icon and then enter the following:
- MAC address–It is a unique address of each device, usually can be found on a sticker on device.
- Caller ID -You can choose a number from the list; the number will be used as caller ID for calls made from the device .
Click the Save button and then reboot the device. The device will connect to the provisioning
server and download the account configuration.
After that it should show the account name on its display and be ready to use. On the list of devices the status should be
now Provisioned .
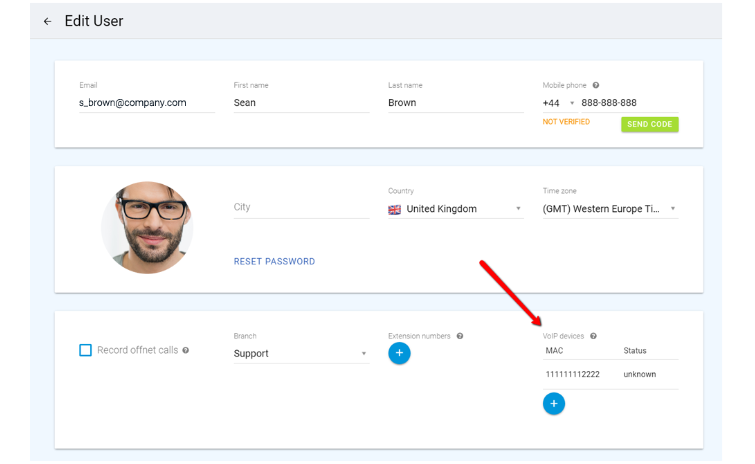
- by admin user through the Usersmenu; Admin can manage devices of other users
- by a user through the My Profile menu
The Click 2 Talk feature enables communication directly from a web browser simply byclicking a link.
It is another dimension of your business phone line.
You can generate a link in EVCOFFICE portal and place it on your website, associate it with a "call me" button or use in your
email signature.
Website visitors or email recipients do not have to sign in or download any additional software as the entire app is based on technology supported by browsers.
- HD Audio
- Video
- Instant Messaging .
When creating a click to call link you can decide what options should be allowed.
You can allow your customers to chat or video with you while browsing your website.
Both calls and chats can be received on your EVCOFFICE app , or on your browser or even you can answer a click 2 Talk call on your voip phone.
The call park feature is usually activated by pressing a preprogrammed button on a phone which transfers the current conversation to a parking extension number and immediately puts the conversation on hold. This event is called parking the call and the call is said to haveparked onto a certain extension. The call can later be retrieved by dialing the parking extension number.
If no one picks up the parked call within the defined time, the system will transfer the parked call back to the person who originally parked the call .
In the Settings/Call parks menu you can create and manage call parks.
To assign an extension number, go to the Settings/Numbers menu.


